
It struck me the other day that I’ve played The Elder Scrolls V: Skyrim more than any other game, even though my Steam account may not reflect it, given that I played it before I was even on Steam and that I’ve played both the vanilla version, Special Edition, and Anniversary Edition on Steam. Combine the pirated copy I originally played in 2011 and the legitimate copies in my Steam library and you have hundreds upon hundreds of hours across multiple playthroughs. Despite it all though, I still find myself learning new things and exploring quests I’ve never done before.
It has given me a lot of time to master and perfect a particularly ferocious interpretation of arguably the most popular Skyrim build: the sneak archer. Today, I’m finally prepared to share that build with you in perhaps its final form but, then again, perhaps not. My ultimate sneak archer build is based on the Anniversary Edition of the game on PC with a total of only three mods that simply make the game more playable but don’t change in any substantial way the gameplay mechanics or the visuals. Those mods are SkyUI, Acquisitive Soul Gems, and Unread Books Glow.. Feel free to ask me about any of these mods and why I use that mod.
I’ve seen a variety of sneak archer builds on the Internet over the years and none come even close to the sheer devastation unleashed by own sneak archer build at legendary difficulty. Give it a whirl. Tell me if there is anything you think could be improved or any useful exploits I might be missing to give my build the edge. Until then, I’m pretty much convinced that this is the most obscenely overpowered build you’re liable to find, sneak archer or otherwise.
Racial Inequality
Most Skyrim sneak archer guides will suggest you choose Bosmer (aka Wood Elf) or Khajit. Others will go the politically correct route and suggest that race doesn’t matter at all. In Skyrim, race does matter, although perhaps not as much as some people seem to think. Bosmer and Khajit are often the default recommendations for this type of build because they have relevant skill bonuses, with the Bosmer receiving +10 to Archery and the Khajit +10 to Sneak. In truth, aside from making for a slightly smoother early game, racial skill bonuses are meaningless.
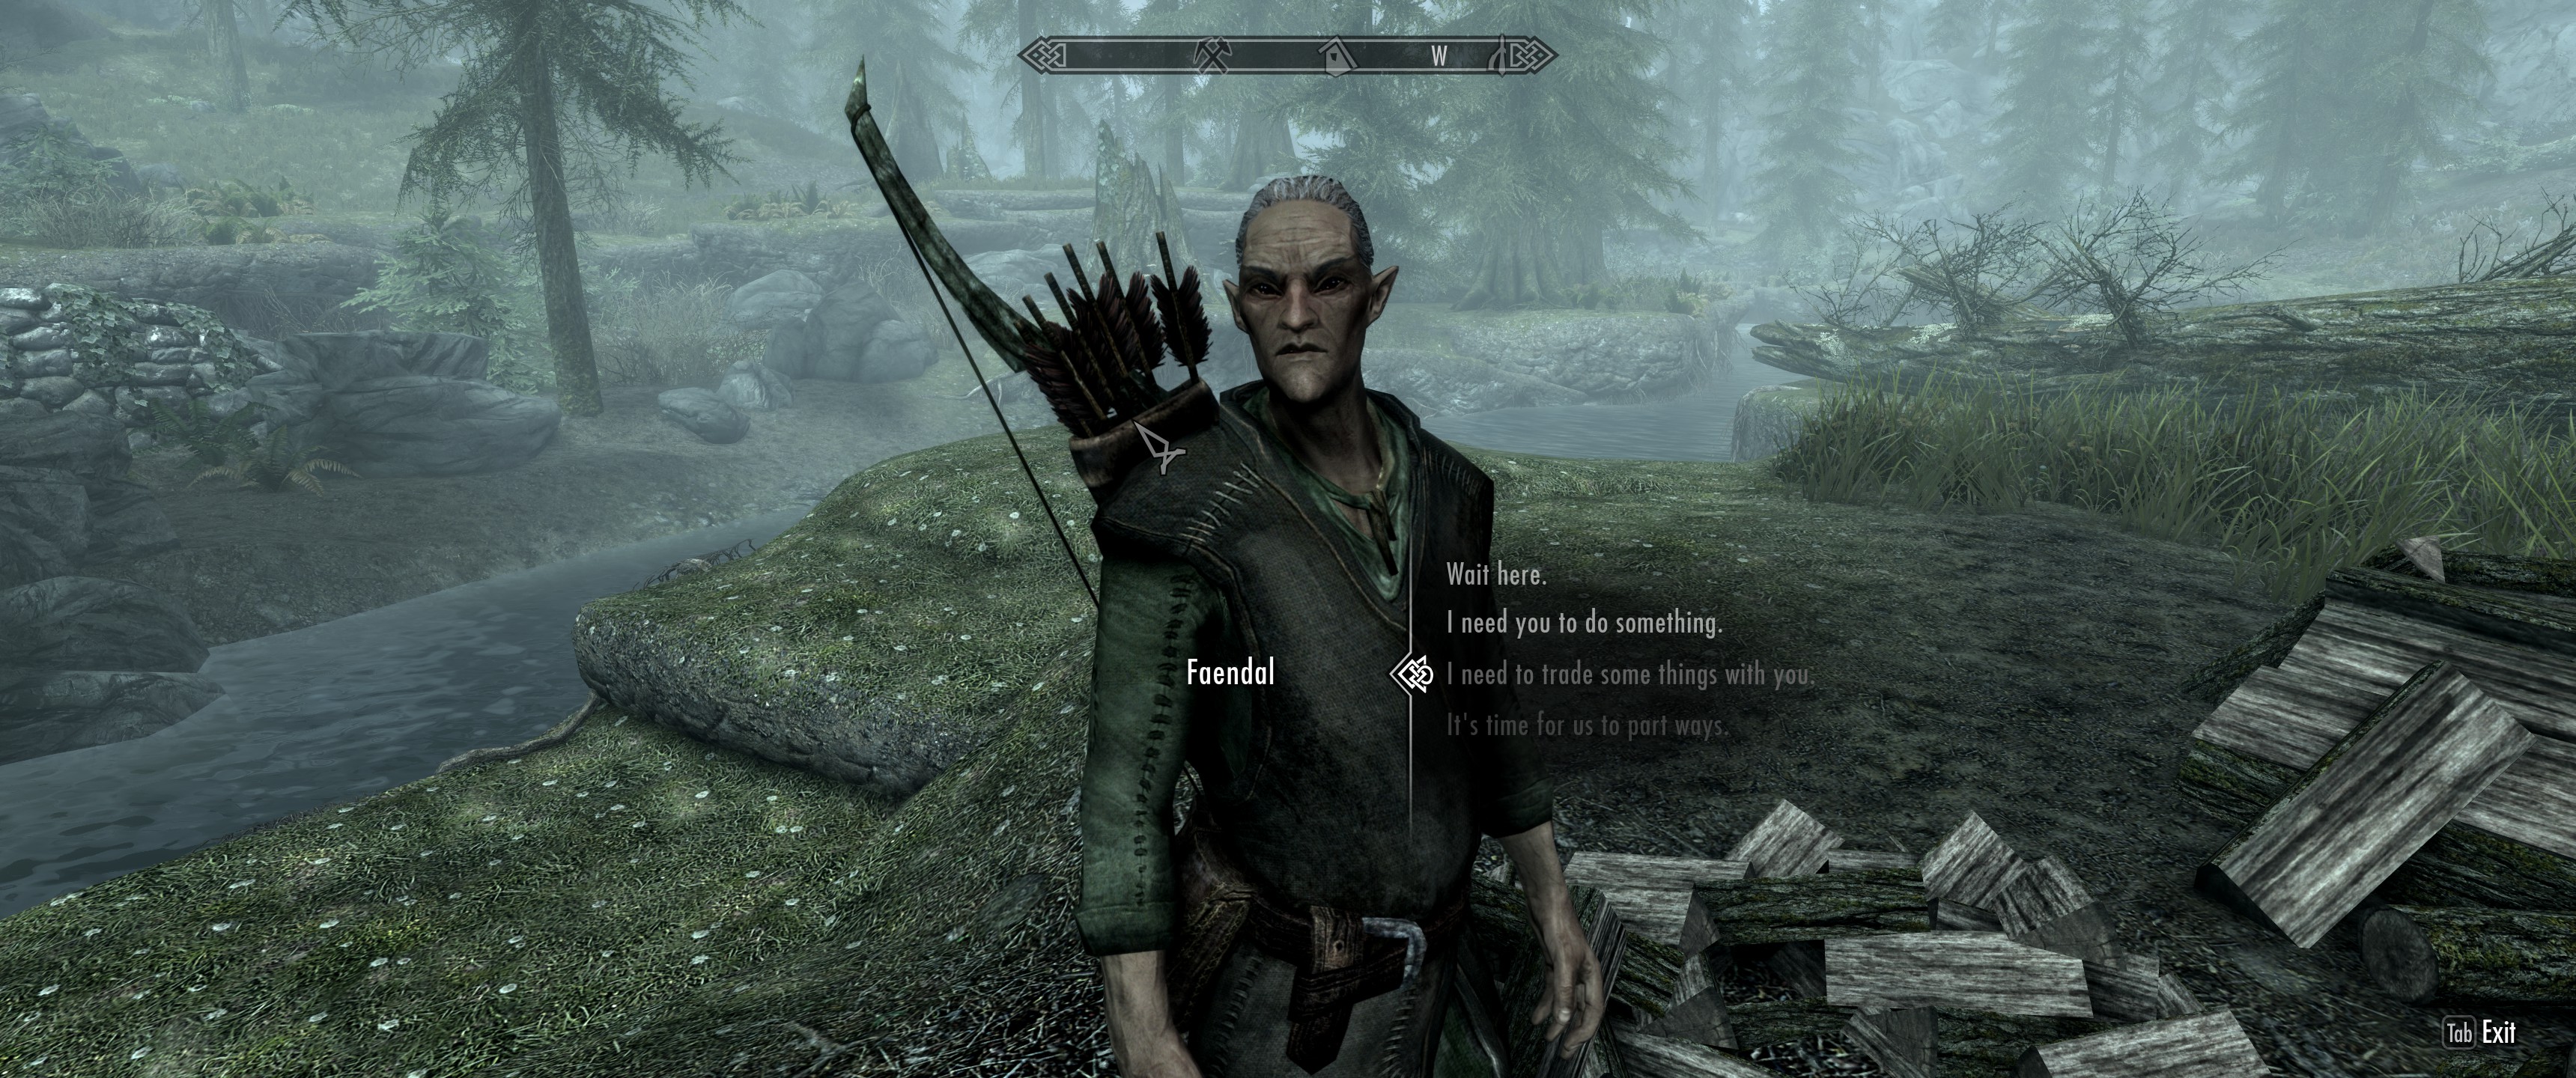
As it happens, while the Khajit can enjoy their head start in Sneak for a short time, the Bosmer bonus to Archery means nothing all because of one Wood Elf named Faendal, whom you will find at the lumber mill in Riverwood upon escaping Helgen. The first quest you should do as a sneak archer after escaping Helgen is A Lovely Letter, which you’ll receive from Faendal. Side with Faendal over Sven by delivering the fake letter to Camilla Valerius at the Riverwood Trader. Upon successful completion of the quest, Faendal can become a follower. Since he also happens to be an Adept-level Archery trainer, you can pay him to train you, access his inventory, and take back the gold. I just keep him as a follower until my Archery hits level 50. To be clear though, sneak-based builds are not for those who insist on having followers.
So if race matters but racial skill bonuses don’t, what is it that makes race so important? Well, in the late game, racial skill bonuses will have lost all meaning, but special abilities will still play a role in your build. Most races have one passive racial ability and one activated racial ability. The Bosmer, for example, get Command Animal. Like its name implies, Command Animal gives the Bosmer command of an animal for sixty seconds, which is virtually useless. Their passive ability is a bit more useful, granting 50% disease and poison resistance. The Khajit get Night Eye, which helps them see in the dark for sixty seconds and they get Claws, which increases their damage dealt with unarmed attacks. Night Eye is a quality of life ability (after all, any sneak archer worth his or her salt should be traveling at night). Claws is completely useless.
Between the Altmer, Argonians, Bosmer, Bretons, Dunmer, Imperials, Khajit, Nords, Orsimer, and Redguards, it can be difficult to know what to choose, but I’ve experimented heavily and have found two races to stand out as the best races for the sneak archer build. The first race is the Orsimer (aka Orc) and it’s all thanks to a little something called Berserker Rage. The Orsimer, you see, don’t have two special abilities like the other races. The Orsimer have only one and that’s because it’s the strongest racial ability in the game.
Berserker Rage doubles damage for sixty seconds, which does stack with Deadly Aim, a perk that grants triple damage from sneak attacks with bows. That means six times the damage dealt with this ability activated. I do love overkill, but I also tend to find that, if this build has one weakness, it’s not damage output.
The second race of choice—and my personal preference—is Breton. Bretons’ racial special passive ability gives them +25% resistance to magic, making for a more defensively-focused sneak archer build. Since you’re going to have a ton of armor and most mêlée targets will go down before they can arrive at your location, magic is one of the few threats, so having an extra 25% resistance is insanely powerful, especially combined with Agent of Mara for +40% resistance in total, making it very easy, with the help of a couple jewelry enchantments, to reach the game’s 85% Resist Magic cap. Forget everything you’ve heard about Bosmer and Khajit, Breton are where it’s at.
Sex
Something no one ever talks about with character creation is sex. You can choose male or female and there is actually a compelling reason to choose a female character for this build. Upon successful completion of The Heart of Dibella for the Temple of Dibella in Markarth, you will gain the Agent of Dibella passive ability that grants +10% damage to members of the opposite sex. Well, as it happens, most enemies in Skyrim that have a sex are male. Getting a permanent +10% damage buff is huge, so trust me and do as I say: Choose female. As a side note, The Heart of Dibella is also the quest you’ll need to do to gain access to the Master-level Enchanting trainer in the base game, Hamal.
Attributes
You will get to a point in Skyrim where attributes are pretty meaningless. You’ll have an endless supply of stamina and enough health to stare down a pack of dragons. Still, I don’t like to be wasteful. That’s why I’m going to recommend you don’t invest any points into magicka. In previous iterations of this build, I spent three levels on magicka in order to be able to use the Muffle spell in the early and mid game, but you will eventually get a pair of boots that completely muffles your movement noise, rendering the spell version obsolete and leaving you with three wasted levels of magicka that could have gone into health or stamina. Just tough it out for the early game. You’ll gain access to the Dark Brotherhood gear as soon as you join and the boots will give you a muffle effect, albeit a weaker one than the spell. Wait until your character reaches level 32 before beginning Trinity Restored. This will guarantee you get the absolute best incarnation of the Nightingale Armor, which most notably includes the Nightingale Boots. These boots, acquired at level 32 or later, provide a 100% Muffle effect. Always keep an eye out for the enchantment itself, as it’s quite rare and provides the full Muffle effect when applied using Enchanting.
For health and stamina, I like to have at least twice as much health as stamina. I definitely recommend leaning a bit more into health in the early game so you won’t get your ass kicked. Stamina, it’s worth noting, also increases your carrying capacity by five points per level. For the sneak archer, stamina is going to determine how long one can hold one’s breath while drawing one’s bow with the Steady Hand perk.
Perks

Race, sex, and attributes matter, but perks are what make and break a build. It’s imperative to choose the right perks and choose them at the right time. Believe it or not, you will have to fight in this game, so you should always focus on your combat skills first. In the case of the sneak archer, this means Archery, Sneak, and Light Armor. In that order. Once your progression in these trees starts to slow down, you can start putting points into the trees you’ll be using to improve your gear. These include Smithing, Enchanting, and Alchemy. In that order.
Alteration, Block, Conjuration, Heavy Armor, Illusion, One-Handed, Restoration, and Two-Handed can all be disregarded entirely, though you’ll obviously gain some points in these skills from skill books. Lockpicking and Pickpocket both play a role in, frankly, any good build and building those trees up is important, but don’t waste any perk points on them. Lockpicking is rendered obsolete by the acquisition of the Skeleton Key, but it’s also the first skill (followed by Alchemy) one should make legendary once the aforementioned Skeleton Key has been acquired. Pickpocket is just a matter of learning to abuse quick saves, but it can also be a dangerous way to level up quickly while not making your character any more viable in increasingly difficult combat situations, so level this one with caution in the early and mid game.
Archery, Sneak, Light Armor, Smithing, Enchanting, and Alchemy are the core skill trees of the sneak archer build. Let’s discuss each individually.
ARCHERY (15)
- Overdraw (5)
- Eagle Eye
- Critical Shot (3)
- Steady Hand (2)
- Power Shot
- Hunter’s Discipline
- Ranger
- Quick Shot
The first and most important skill tree is going to be Archery. Like I said, you will have to actually fight in this game, so Archery, being your primary combat skill, is vital. This is a skill tree you will want to almost completely max out, which is to say you will want to invest in every perk in the tree except for Bullseye. Whenever a new perk opens up in the Archery tree, that is, more often than not, the perk you should be prioritizing (again, excluding Bullseye).
Don’t forget to use the aforementioned Faendal exploit to level Archery up to 50 at the very start of the game. When you Archery skill reaches 90, I recommend completing the Composure, Speed, and Precision quest, which you can do at Angi’s Camp in the Jerall Mountains south of Falkreath. Completing this unmarked quest will bequeath you six skill levels in Archery for a couple minutes of your time. The reason I recommend waiting until Archery level 90 or so is because skills become increasingly difficult to level, so you’ll get the most out of Composure, Speed, and Precision by having a bit of patience. 90 is also a good number because you can no longer gain skill points from trainers upon reaching level 90 in a skill tree.
SNEAK (3)
- Stealth (1)
- Backstab
- Deadly Aim
The build is called the sneak archer, so it should come as no surprise to anyone that Archery and Sneak will be the most central skill trees, with Sneak coming in second to Archery. In order to land those juicy critical hits though, it’s important to remain undetected. You do not need every perk in this tree; in fact, there are only two essential perks in the Sneak tree, with Backstab merely being a prerequisite for Deadly Aim.
There are two perks in the Sneak tree that should be your top priority when they become available. The first is the very first point you’ll be putting into Stealth. Subsequent points only make you +5% more difficult to detect, but the first makes you +20% more difficult to detect, which is why I only suggest putting a single point into Stealth. The second high priority perk in the Sneak tree is Deadly Aim. As a sneak archer, Deadly Aim is your bread and butter, especially for Orsimer sneak archers who can pump out six times the damage with Berserker Rage.
To level Sneak up, just use it. Sneak anywhere and everywhere you go until Sneak reaches 100.
LIGHT ARMOR (5)
- Agile Defender (1)
- Custom Fit
- Unhindered
- Wind Walker
- Deft Movement
Light Armor is a difficult tree to master with the sneak archer build because the way to gain points in Light Armor is to get hit. Sneak archers don’t get hit very much. In the early game, one of the best ways to gain a few points in Light Armor is to brawl. Don’t try to rush Light Armor in the early game though. It’s just a safeguard for when you do have to take a warhammer to the face from time to time, though you’ll be getting hit less and less as you progress through the build, especially if you start using the Paralyze enchantment on your bow, which I do not recommend because it makes it difficult to finish your opponents off when they fall into a horizontal position, making them a challenging target at range. This is the same reason I do not get Bullseye in the Archery tree.

Compared to Heavy Armor, Light Armor is the way to go because it allows for quieter sneaking, slows the wearer less, it weighs less, and because Skyrim has a maximum armor cap, meaning light armor will eventually offer just as much protection as heavy armor in the late game. The armor cap is also why you shouldn’t bother putting more than a single point into Agile Defender or putting a point into Matching Set.
SMITHING (6)
- Steel Smithing
- Elven Smithing
- Advanced Armors
- Arcane Blacksmith
- Glass Smithing
- Dragon Armor
Ultimately, your goal with Smithing is to have a legendary set of studded dragonscale armor and a legendary dragonbone bow, but, for the early and mid game, you’re going to be relying chiefly on hide armor, leather armor, elven armor, scaled armor, and glass armor, so you’re going to want to work your way up the Light Armor side of the Smithing tree. Prioritize Smithing perks over Enchanting perks since Smithing levels up substantially slower than Enchanting and there’s no reason to bother wasting good soul gems on hide armor.

I strongly recommend completing Unfathomable Depths early on in your playthrough. The reward for completing Unfathomable Depths is Ancient Knowledge, which includes a +15% bonus to how quickly one learns Smithing. I find the best ways to level up Smithing once I’ve completed Unfathomable Depths is to craft massive numbers of iron daggers, which can subsequently be used to build up your Enchanting skill; craft jewelry; and craft arrows. As an archer, you’ll need arrows, so this is a great way to kill two birds with one stone. There is no better way to get large quantities of high quality arrows (e.g., glass arrows) than by manufacturing them yourself, which we’ll discuss more later.
ENCHANTING (11)
- Enchanter (5)
- Soul Squeezer
- Fire Enchanter
- Soul Siphon
- Insightful Enchanter
- Corpus Enchanter
- Extra Effect
Assuming you have the Acquisitve Soul Gems mod, which any sane person should because the game is nigh unplayable without it, enchanting is the best skill tree in Skyrim. Whatever your build, Enchanting will make it better. While Enchanting won’t be your focus in the early game, it will be the cornerstone of the sneak archer build in the mid and late game. Paired with Smithing and Alchemy, you will be able to craft enchanted weapons, armor, and jewelry that can break the game. This is called power crafting, which we’ll discuss more later.
Begin your Enchanting career by completing the The Black Star as soon as possible. Toward the end of the quest, you’ll have the option of siding with Aranea or siding with Nelacar. If you side with Aranea, you’ll get Azura’s Star, which is good, but the reward for siding with Nelacar, the Black Star, is far greater. The Black Star is the essential tool for any aspiring enchanter. Soul gems are good for a single use, but the Black Star can be filled and refilled ad infinitum, assuming you have already learnt the Soul Trap or Fiery Soul Trap enchantment.
Enchanters should focus more of their questing on Dwemer ruins, where you’ll find a wealth of soul gems of all sizes by looting the Animunculi you’ll encounter therein. Only the Soul Cairn bests Dwemer ruins for soul gem harvesting. Visit giant camps throughout Skyrim with a (Fiery) Soul Trap bow to collect grand souls from mammoths and greater souls from the giants themselves. I use grand soul gems and black soul gems for my serious enchanting while greater soul gems, common soul gems, lesser soul gems, and petty soul gems are all used to enchant iron daggers for leveling purposes. I use my Black Star for serious enchanting too, but, because it’s so easy to refill, I primarily use it for recharging my enchanted bows, which I strongly recommend you enchant with Fiery Soul Trap.
Level up enchanting by first crafting iron daggers and then enchanting them with Banish. Banish gives the enchanted weapons a high monetary value, so you can then make some money back by selling your wares. Use the Paralyze enchantment as an alternative if you don’t have Banish yet or combine it with Banish if you already have Extra Effect and you’re just enchanting items for coin. Using the Black Star, you can also recharge your weapon, refill the Black Star, recharge your weapon again, and so forth. You gain some Enchanting experience each time you use the Black Star (or Azura’s Star) to recharge your enchanted weapon.

There are several enchantments to watch out for as you explore Skyrim, including Banish, Fiery Soul Trap, Fire Damage, Fortify Alchemy, Fortify Archery, Fortify Health, Fortify Smithing, Fortify Sneak, Fortify Stamina, Muffle, Resist Magic, and Waterbreathing. Find items with these enchantments and rush them to an Arcane Enchanter to be disenchanted, thus teaching you the enchantment. If you must, purchase these items from a vendor. Soul Trap is common, but you can only get Fiery Soul Trap by disenchanting the Steel Battleaxe of Fiery Souls found in Ironbind Barrow, so put that on your priority list, as Fiery Soul Trap provides more charges than the standard Soul Trap and also adds a bit of bonus fire damage. For bows, Fiery Soul Trap is my enchantment of choice, but, of course, you’ll have the option of adding a second enchantment to your items once you max out Enchanting and get the Extra Effect perk. Fire Damage has great synergy with Fiery Soul Trap.
For my main set of gear (i.e., excluding my dedicated smithing/alchemy gear used for power-crafting), these are what I use:
Bow: Fiery Soul Trap + Fire Damage
Headgear: Fortify Archery + Waterbreathing
Cuirass: Fortify Health + Fortify Stamina
Boots: Muffle + Fortify Sneak
Gauntlets: Fortify Archery + Fortify Sneak
Ring: Fortify Archery + Resist Magic
Amulet: Fortify Archery + Resist Magic
ALCHEMY (7)
- Alchemist (5)
- Physician
- Benefactor
The primary purpose of Alchemy in the sneak archer build is to produce potent potions to fortify Enchanting or Smithing. I don’t recommend doing much with Alchemy until the late game, but what I do recommend is beginning to collect Alchemy ingredients from the very beginning of the game. By the time one reaches the late game, one will have a wealth of Alchemy ingredients. As in enough Alchemy ingredients to reach level 100 Alchemy instantaneously.

Most containers in the game will reset, erasing all the contents within, so having a house is important. The containers in the Abandoned House in Markarth do not reset, so they can be used for storage until such time as you can afford a proper house. The Abandoned Shack in Hjaalmarch also has non-resetting containers. In the base game, I strongly recommend Honeyside in Riften for a starter home. For those with the Anniversary Edition of the game, however, there is nor reason not to just grab one of the free Creation Club homes as soon as possible. My two favorites by far are Myrwatch and Bloodchill Cavern/Manor, with Myrwatch being somewhat easier to acquire in the early game. These outstanding homes render all other homes in the game virtually obsolete.
To level Alchemy effectively and intelligently, it’s important to understand that Alchemy levels the speed at which one levels Alchemy is dependent on the value of potions and/or poisons being crafted. Look up a guide on the most valuable potions before you begin burning through your ingredients. The following are ten of the most valuable ingredient combinations in Skyrim:
- Wheat + Giant’s Toe + Creep Cluster
- Giant’s Toe + Wheat
- Blue Mountain Flower + Hanging Moss + Hagraven Feathers
- Deathbell + Salt Pile + Taproot
- Blue Mountain Flower + Hanging Moss + Butterfly Wing
- Fire Salts + Salt Pile + Deathbell / Moon Sugar / Creep Cluster
- Creep Cluster + Scaly Pholiata + Giant’s Toe
- Blue Mountain Flower + Hanging Moss + Nordic Barnacle
- Blue Mountain Flower + Hanging Moss + Chaurus Eggs
- White Cap + Ice Wraith Teeth + Vampire Dust
Altogether, these encompass forty-seven points. All remaining perk points can be spent on various quality of life perks or small optimizations. Personally, I like putting a couple of points into Augmented Flames from the Destruction tree to further enhance fire-based weapon enchantments, which synergizes well with Fire Enchanter from the Enchanting tree. Extra Pockets from the Pickpocket tree is a phenomenal quality of life perk that means fewer stops at home between adventures. If you find you’re running dangerously low on perks from the six core skill trees, feel free to see a skill trainer to build up one of those trees and thus guide the development of your build.
Standing Stones
Someone in the comments asked about the Standing Stones and I was remiss not to discuss them here. Standing Stones exist in Skyrim as a means of granting your character additional benefits, but you can only benefit from one standing stone at a time. For the sneak archer, there are two Standing Stones worth visiting. The first is the Thief Stone you’ll bump into just after fleeing Helgen, assuming you follow the path with either Hadvar or Ralof to Riverwood, which you should. There are actually three Standing Stones at the Guardian Stones: the Warrior Stone, the Mage Stone, and the aforementioned Thief Stone. Throughout the rest of Skyrim, Archery is considered a warrior skill, but, in this special exception, Archery falls under the Thief Stone, as does Sneak, Light Armor, and a host of other useful skills. As such, you’ll want to choose the Thief Stone at least until such time as you have maxed out your Archery and Sneak skills, as the Thief Stone grants a +20% increase to the speed at which your character learns the Archery, Alchemy, Light Armor, Lockpicking, Pickpocket, Sneak, and Speech skills.
Once Archery and Sneak are mastered, it’s time to consider switching to a new Standing Stone. I encourage you to choose the Lady Stone, which you’ll find on a small island in Lake Ilinalta. The Lady Stone increases health and stamina regeneration by 25%.
Vendor Exploit
Some enchantments can be difficult to find. Sometimes you just need a particular type of crafting material and cannot be bothered to spend an indefinite amount of time seeking it out in Skyrim‘s vast open world. This is when the vendor exploit becomes key. Sadly, I didn’t know about it myself until I had already sunk hundreds of hours into the game.
Vendors’ inventories only refresh once every few days. I don’t know the exact period of time, but it takes awhile. On one hand, you could just travel all around Skyrim and visiting all the vendors. On the other, that sucks, so this is what you do. Save your game. Attack the vendor. You don’t need to kill him or her. I usually just fire a single shot from my bow, which, depending how far along I am in the game, will either injure or kill them. Then reload your save. Speak to the vendor again and they should have a refreshed inventory. Keep doing this until you find what you’re looking for. I recommend using quick save (F5) and quick load (F9) here to save yourself some time.
Arrows
There is no shortage of arrows across Skyrim, but you don’t want to be stuck using iron arrows, Falmer arrows, or Forsworn arrows forever because the type of arrows you use will effect your overall damage output. So where do you get quality arrows and do so without breaking the bank buying them from vendors like a sucker? Well, you can find certain types of arrows in specific locations, such as the Ancient Nord Arrows you’ll be able to loot from the Draugr in Nordic tombs and those are, in fact, a slight upgrade from the iron arrows with which you’ll start, but that’s just a drop in the bucket. You’re going to need a lot more arrows than that, especially if you don’t yet have the Hunter’s Discipline perk.
There are two solutions. One primitive solution that I use quite a bit in the early game is Pickpocket. You can pickpocket large quantities of steel arrows from guards in every major settlement in Skyrim. Just be careful not to raise your Pickpocket skill too much too early or you’ll find yourself getting owned by Skeevers in the early game. The real and proper solution to arrows, however, is a pickaxe and a woodcutter’s axe. This solution does require that you have the Dawnguard add-on.
For those who have the Dawnguard add-on, grab a pickaxe and a woodcutter’s axe as early as you can and just keep them in your inventory at all times. This is going to eat up 20 weight in your inventory, but it’s well worth it. As you explore Skyrim, you’ll be able to mine ore veins using the pickaxe, which does not need to be equipped to be used. Whenever you see an ore vein, mine it. Take all that ore to a smelter that you’ll often find outside mines or near blacksmiths and smelt it into ingots. You cannot mine steel. There is no such thing as steel ore. To make steel ingots, you’ll need to combine iron ore and corundum ore. While gold ore, silver ore, and quicksilver ore are not used to craft arrows, I tend to mine those as well for other types of crafting. Gold ingots and silver ingots, for example, are used in jewelry crafting, which is also a great way to build up your Smithing skill while making some money in the process. Another way to build up your Smithing skill is to build one or more homesteads from the Hearthfire add-on, which, like ingredients for Alchemy, gives one a reason to begin harvesting building materials from the very start of one’s playthrough.

There are two ingredients needed when crafting arrows. One is the ingots. The other is firewood. Firewood is free. Just find a wood chopping block in one of the settlements, at a lumber mill, at some player houses, or any of the Hearthfire homesteads, click on it, and your woodcutter’s axe will magically equip itself. Each session yields six pieces of firewood. Each ingot and piece of firewood taken to a forge or anvil will yield twenty-four arrows, or 144 arrows per woodcutting session. In essence, each piece or ore will yield twelve arrows. Iron ingots will yield iron arrows, steel ingots steel arrows, refined moonstone elven arrows, and refined malachite glass arrows. Dragonbone arrows can also be crafted, but, instead of ingots, they require dragon bone, which can be harvested, naturally, from slain dragons without any need for the pickaxe.

Iron arrows can be crafted as soon as you have some iron ingots and firewood. To craft steel arrows, you first require Steel Smithing. To craft elven arrows, you first require Elven Smithing (available at Smithing level 30). To craft glass arrows, you first require Glass Smithing (available at Smithing level 70). To craft dragonbone arrows, you first require the Dragon Armor perk (available at Smithing level 100).

As a side note, some people, even if they’re not investing into the Heavy Armor tree, like to get Dwarven Smithing in order to craft Dwarven arrows. This is because Dwarven metal ingots are extremely common in Dwemer ruins and because they can be easily crafted by smelting a wide variety of Dwarven items, including bent Dwemer scrap metal, large Dwemer plate metal, small Dwemer plate metal, solid Dwemer metal, large Dwemer struts, and large decorative Dwemer struts. This is a very fast way to both level up Smithing and to get a superabundance of decent arrows. Personally though, I don’t do this because my sights are always set on the late game, when I don’t want to be stuck with Dwarven arrows and a perk I never use anymore.
Power Crafting
I play on legendary difficulty or I at least gradually switch to legendary difficulty as I progress through the game. The reason I am able to plow through legendary difficulty with nary a scratch to show for it is power crafting. This is a term I am using to describe a way to craft obscenely overpowered gear in Skyrim. It requires three skill trees: Smithing, Enchanting, and Alchemy. Smithing can drastically increase the damage dealt by your weapons and the armor provided by your apparel by bringing your weapons to a grindstone and your apparel to a workbench. The higher your Smithing skill, the greater the improvement to your gear.
Now, what if there was a way that you could artificially boost your Smithing skill? Well, as it happens, there is. The first way is to enchant your cuirass, gauntlets, ring, and amulet with Fortify Smithing. The second is to use Alchemy to craft potions with the Fortify Smithing effect. The higher your Enchanting skill, the more effective your enchantments will be, so what if you could also fortify Enchanting? There is no enchantment for that, but, in addition to Fortify Smithing, Fortify Enchanting potions can also be crafted using Alchemy. Well, what about Alchemy? Is there any way to boost Alchemy? There’s an enchantment for that and, if you have the Dragonborn add-on, wearing four relics of Azhidal grants Azhidal’s Genius, an effect that fortifies Enchanting by ten points.
Initially, I leave Alchemy out of the mix. Once I’ve started investing points in Alchemy perks, I know I’m in the late game. For the mid game, I focus on Smithing and Enchanting and follow these steps:
- Find a Fortify Enchanting potion in the wild or use the aforementioned vendor exploit to purchase one
- Use the Fortify Enchanting potion at an Arcane Enchanter
- Enchant a cuirass, gauntlets, an amulet, and a ring with Fortify Smithing
- Craft or find the gear you wish to enhance with Smithing
- Find a Fortify Smithing potion in the wild or use the aforementioned vendor exploit to purchase one
- Go to an area with a grindstone and workbench
- Use the Fortify Smithing potion
- Upgrade your gear (already enchanted gear can only be upgraded with the Arcane Blacksmith perk)
- Equip your newly upgraded gear
- Put your crafting gear away in your house so it doesn’t weigh you down when not in use
Things get a bit more complex when you begin producing your own potions. At that point, you’ll want to have maxed out the Enchanting tree to get the Extra Effect perk in order to then be able to craft a set of gear that will be able to fortify both Smithing and Alchemy. Unlike Fortify Smithing, Fortify Alchemy cannot be applied to a cuirass, but, also unlike Fortify Smithing, it can be applied to headgear. This is important because there’s a little exploit that can further enhance your Alchemy prowess.
As it happens, there is a way to wear two pieces of headgear simultaneously to double the fortification to your Alchemy skill. Specifically, you will require a circlet and you will require a Falmer helmet that you’ll find in abundance by exploring various Dwemer ruins. This will not work with the Falmer heavy helm. It must be the standard Falmer helmet. Falmer gear, by the way, can be improved at the workbench with Chaurus chitin (requires Advanced Armors), but you’ll only be wearing the Falmer helmet in town.
With the circlet and Falmer helmet combo in addition to the rest of your Fortify Alchemy gear, you’ll be able to craft some seriously effective Fortify Enchanting and Fortify Smithing potions. Using these potions, you can then enchant even better crafting gear, which can then be used to craft even more effective potions, and so forth ad infinitum. In the end, you’ll have insanely overpowered crafting gear and insanely overpowered Fortify Smithing potions that can be used to craft the ultimate set of dragonscale armor and the ultimate dragonbone bow. You can then bring your ultimate gear to an Arcane Enchanter, guzzle a powerful Fortify Enchanting potion, and apply all the recommended enchantments I mentioned previously (e.g., Fiery Soul Trap, Fortify Archery, and so on).
Again for those with the Dragonborn add-on, one of the most powerful tools for a power crafter is The Sallow Regent, one of seven Black Books scattered across Solstheim. The Sallow Regent can be found in White Ridge Barrow, a Nordic ruin on the northern end of the island. With this tome of esoteric knowledge, the player is granted one of the following:
- Seeker of Might: Combat skills are 10% more effective
- Seeker of Sorcery: All spells cost 10% less magicka. Enchantments are 10% more powerful.
- Seeker of Shadows: Stealth skills are 10% more effective.
Seeker of Might also increases Smithing by 10% while Seeker of Shadows increases Alchemy by 10%; what’s more there is no limit to how many times one can swap between these effects by simply opening the book again, though one must return to Solstheim any time one wishes to do so. For general adventuring, I stick to the Seeker of Might for the +10% to my Archery skill, but, when it’s crafting time, I find myself making many trips back to Solstheim. If I need to craft some potions, I switch to Seeker of Shadows. If I need to enchant some items, I switch to Seeker of Sorcery. If I need to improve some gear, it’s the Seeker of Might.
Power crafting is the most broken thing in the game and I do not hesitate to capitalize on that. Just remember that already enchanted gear can only be upgraded at a workbench or grindstone if you have the Arcane Blacksmith perk. In the early game, it’s best to upgrade your gear before taking said gear to an Arcane Enchanter.
Horsing Around
Some may be tempted to travel around Skyrim on horseback. I recommend that you basically never use horses. As a sneak-based build, horses are just a bad idea. You can’t sneak while on horseback, so your location will be given away. Dismounting takes forever, so you’re liable to endure some damage. Moving around on horseback also prevents you from gathering Alchemy ingredients, which you should be doing at all times. The one and only advantage a horse gives you is that horses can climb steeper slopes. I won’t even give them speed as an advantage because that’s what fast travel is for.
Questing
Nothing beats a blind playthrough of Skyrim, but, once you’ve done that, you want to start finding ways to optimize your questing so it provides the greatest benefit to your build and you can reap those benefits for a long, long time. That’s why it’s important to have a loose plan as to which quests you’ll pursue first. I’m not there to tell you a precise order in which to complete quests, but what I will do is what I’ve already done to some extent and suggest which quests and questlines you ought to prioritize. For example, a quest that rewards you by granting you a skill point in Block or Alteration doesn’t really serve much purpose for a sneak archer. I’d still do it because it is, after all, a game, but I wouldn’t put it on my list.
Here are the quests you should do sooner rather than later:
- A Lovely Letter (side with Faendal)
- Main Quest
- Dark Brotherhood quests 1-4
- Unfathomable Depths
- The Black Star (side with Nelacar)
- Coming of Age
- The Heart of Dibella
- The Book of Love
- Thieves Guild quests 1-8
- A Chance Arrangement
- Taking Care of Business
- Loud and Clear
- Dampened Spirits
- Scoundrel’s Folly
- Speaking with Silence
- Hard Answers
- The Pursuit
- NOTE: Wait until reaching level 32 before beginning the ninth quest (Trinity Restored) and tenth quest (Blindsighted) of the Thieves Guild questline.
- Black Book: The Sallow Regent
- Unearthed
Jorrvaskr and the Elven Bow
After completing Unbound and A Lovely Letter, it is imperative that you quickly make your way to Whiterun. Seek out Jorrvaskr, mead hall of the Companions. Do this before any further questing. In the lower floor of Jorrvaskr, find Aela‘s bedroom. Within her bedroom, you will find a locked display case containing an Archery skill book and an elven bow. The elven bow makes for an incredible starting bow. By this point, you should have at least three or four lockpicks in your inventory. This should be an Expert-level lock, so it could be a tricky one at this level. Just be sure to pop a save before trying.
Skeleton Key Conundrum
I’ve mentioned the Skeleton Key briefly. The Skeleton Key is one of the most valuable quest rewards in the game. No, you don’t need it. Lockpicks are common and Lockpicking becomes easy as your skill maxes out. It’s a quality of life thing to never have to deal with broken lockpicks again. The problem with the Skeleton Key, which you’ll receive upon completing the tenth Thieves Guild quest, Blindsighted, is that it’s a better reward than the reward for completing the remainder of the Thieves Guild questline. You see, the subsequent quest, Darkness Returns, forces you to return the Skeleton Key to Ebonmere in the Twilight Sepulcher in exchange for one of three special Nightingale powers, all three of which are inferior to simply keeping the Skeleton Key by not bothering to complete the Thieves Guild questline. This is what I recommend you do until you’ve literally completed every other quest in the game.

Thank you.
LikeLike
You’re welcome.
LikeLike
So I just completed “The Horn of Jurgen Windcaller.” Are your quest steps in any particular order or should I just do them all whenever? Currently level 16, not totally sure what to do. Is it too early to start Dark Brotherhood or Thieves? Thanks again!
LikeLiked by 1 person
I would suggest the first four quests of the Dark Brotherhood quest line just to get the Shrouded Boots (the first quest, Delayed Burial, is totally optional and, frankly, easy to miss). Then I would do The Black Star and Unfathomable Depths if you haven’t already. After that, spend some time in Riften doing The Raid and Supply and Demand so you can gain access to the Honeyside house. Finally, I think it would be a good time to focus on the Thieves Guild once you have the aforementioned quests out of the way. To answer your question though, it’s never too early do begin the Dark Brotherhood or Thieves Guild quest lines.
LikeLike
Thanls for the guide, one quick question is does this particular build work on ps4 as you mentioned most have mods and I not sure if ps4 has them. As I orginally used the PC to play skyrim however it need repairs so I pick the game up on the ps4 console.
LikeLike
I’m new to Skyrim and have gravitated towards sneak archer. I have read up on various build write ups, and have found this one very informative. I don’t play much at any given time, unlike my younger days, so I want to be as productive as possible. This post gives my character purpose and direction and I salute you for that.
LikeLiked by 1 person
That’s great to hear and best of luck to you!
LikeLike
This write-up helped me out more than you’ll ever know. Just wanted to say a word of thanks.
LikeLike
Good to know!
LikeLike
This may be coming out of left field, but would you have any tips for a Dead is Dead playthrough? Currently using this guide and simply cannot get past level 14.
LikeLike
What are your thoughts on standing stones? Thanks so much for this man! I’ve never played archer or the dark brotherhood parts before so this guide made everything so much smoother!
LikeLike
The Thief Stone is the way to go for this build until you get Archery and Sneak to 100. The Shadow Stone is decent for the invisibility it grants for sixty seconds once per day, but the Steed Stone grants +100 carry weight and equipped armor has no weight or movement penalty, so, in terms of quality of life, that’d be my pick.
LikeLiked by 1 person
Thanks for the quick response! I didn’t even see it until now that I’ve got more free time to play.
LikeLike
Best and most informative guide i read so far if not for this i would have gone woodelf or khajit as i am new the game , thanks a lot man
LikeLiked by 2 people
Hello, first of all thanks a lot. But why way to level 32 to finish the thieves guild line quest?
LikeLike
wait*
LikeLike
Hello brother, I just found why. Thank you very much.
LikeLike
So, I read your guide and couldn’t find if I should partner up with the Dawnguard or become a Vampire. What’s your opinion this choice?
LikeLike
I’d leave it up to personal preference. Personally, I find playing as a vampire to be pretty obnoxious.
LikeLike
I’ve fired up Skyrim again, this was a good read at a time when I…can’t play Skyrim.
Did not know about the vendor exploit or the falmer helmet trick! I’ve been playing this game for 9 years!
Can’t wait to start a Breton Archer. Have chosen Breton because it is frustrating to be overpowered but still get slain by a single frost attack.
Great article, thank you. Also thank you to my Google algorithm which clearly nudged this to the top of my feed since my phone has heard me playing Skyrim again heh.
LikeLiked by 1 person
So much good information in this article, and well written too. I’m doing a nostalgia play through now, and doing a sneak archer. Like you I have way more hours in this game than I care to think about, but find something new each play through. From your guide, I never knew the orc racial multiplies through with stealth attack bonuses, so I might play with that.
Much depends on preferences and play style. Indeed, one reason I think Skyrim is the best open-world RPG ever made is that you can play it almost any way you want. But here are a few ways I’d differ:
1) Work the enchanting early, work it hard. One of my highest priorities is a weapon with soul trap, and almost every septim I get early game goes to petty and lesser soul gems (College of Winterhold is a very early visit). Agree, get the black star from the Azura quest line as soon as practical. When killing humanoids, you can dump the charge in the black star each time and increase enchanting skill by charging up the soul trap on your bow (you get full points in enchanting even if you have only used one shot of the enchantment’s charge before you re-charge using the black star). And selling enchanted daggers to blacksmiths will pay for training from them. Thus, you can almost automatically level smithing by leveling enchanting. This play through, I think I got perhaps 15 points total from actually crafting weapons and armor, very little grinding involved. After you hit 90 smithing, you can start selling daggers to Grelka in Riften to pay for light armor training.
2) I find I don’t need 5 points in stealth. 1 point to get to the juicy stuff higher on the left side. At high level you’ll be a ghost already. Patching over with a +sneaking enchant earlier can be good, but not really needed crucial either I find.
3) I find you don’t need to put any points into light armor at all for a sneak archer build if you don’t want to. Especially if you have alchemy for invisibility pots in a pinch (or illusion, but that’s a different sneak archer variant). Become aetherial shout can help get you out of situations in which you are likely to take hits too. Even without any points in light armor, if you max all three crafting skills you can at least get a pretty respectable armor level. And if you invest just a couple of points (one in agile defender, one for custom fit) I believe you can get pretty close to cap at least. But my favorite sneak archer of all time wore only cloth after level 15 or so. I personally love the tension of being able to be one-shotted on legendary difficulty. Sneak archer can get boring if you don’t gimp yourself somehow (that’s all a matter of taste).
4) For an enchanting/alchemy base: Anise’s cabin, small detour on the way to Riverwood from Helgren. She seems innocent at first, but if you are role-playing a goodie you will find stuff in the cabin to ease your guilt about killing her for her house. Totally free, and the containers (in the basement at least; never tried the others) don’t re-spawn. Even after I own Honeyside, I find no reason to move my enchanting and alchemy supplies out of the cabin until I get the house in Ravenrock. The house in Ravenrock has everything a crafter needs. Or until you build your own mansion, if your are into that. Of course, if you are not playing with fast travel, Anise’s cabin is a bit out of the way once you are done with the area.
LikeLiked by 2 people
Hi, just wanted to say thank you for this awesome guide.
Also, quick question: why do you recommend grabbing quest items that encumber you?
Thanks again, my current playthrough has been awesome thanks to this guide.
LikeLike
Thanks for the feedback.
I just mean that these items encumber you and you should therefore prioritize completing their corresponding quests so as not to remain encumbered indefinitely.
LikeLike
This helped me a lot!
I’d say you don’t even have to trap your own souls for enchanting all that much. A few runs through Dwemer dungeons should get you a bunch of filled soul gems which you can use to start enchanting iron daggers. Then you can go to a general goods merchant to buy all of their filled soul gems while selling them your enchanted daggers and use the vendor exploit to refresh their inventory. Once you run out of enchanted daggers, use your new soul gems to enchant more and repeat the whole tedious process. I’ve used Marked for Death on Belethor more times than I can count.
I’m surprised you haven’t mentioned the Aetherium Crown. You can use it to store the Lover Stone (+15% leveling to all skills) which stacks with a Well Rested bonus (if you remove the crown before sleeping). Combined with Ancient Knowledge and the Warrior Stone, this can add up to +65% leveling bonus.
LikeLike
Similarly to Agent of Dibella, choose Lover’s Insight from “Black Book: The Winds of Change” for +10% more damage and better prices from people of the opposite sex.
LikeLiked by 1 person
Great tip! Just got myself up to +20% damage against male enemies, feels good.
LikeLike
People are still reading this guide in late 2020, and it’s been of great use! I’ve been a fan of Bethesda’s Fallout games since 3 came out and yet I’m one of a number of people who just couldn’t get into Oblivion or Skyrim after sinking a number of hours into them. I think the size of the map and lack of concrete objectives are what made me put the controller down. It was this guide’s focused objectives and step-by-step processes to character building, mixed with the free time I’ve had in quarantine, that has allowed me to appreciate this game’s vast amount of content. Can’t thank you enough.
LikeLiked by 1 person
Really glad to hear/read it!
LikeLike
https://www.nexusmods.com/skyrim/mods/4061
It makes dragon scale look a little more stealthy
LikeLike
Thanks for the guide…I played through once like 7 years ago as a destruction mage and I figured I’d give it a go on Switch. Problem is that I can’t get mods….Is the Acquisitve Soul Gems mod really that much of a deal breaker?
LikeLike
If you plan on using enchanting, arguably the best perk tree in the game, yes. Finding your grand soul gems have been filled with petty souls gets old really fast. I am unaware of any other way to prevent this issue that doesn’t entail some extreme inconvenience.
LikeLike
Newb question – why do you ignore the Companions line to make Aela a friend to do the tutoring trick with her up to L75?
LikeLike
If I recall correctly, you have to get pretty far along in the Companions quest line in order to unlock that as an option and there are simply higher priorities. By the time I eventually get around to the Companion quest line, I find that I have already exceeded Archery level 75. This contrasts with Faendal, who can be unlocked by simply delivering a letter, whereas the Companion quest line has little to offer a Sneak Archer build aside from Aela’s training. By the time you’re finished with Faendal, your Archery will already be at level 50. The extra 25 levels takes no time at all, so, aside from the Bow and Book I like to steal from Aela’s room in the early game, I don’t find her particularly useful.
LikeLike
Thanks a lot for a comprehensive guide with rational arguments regarding choices. This is one of my favorite builds. What’s your thoughts on using the bound bow?
LikeLike
I’d like to maybe do a fresh interpretation of the sneak archer build using Bound Bow just for fun. It’s very powerful and has many advantages, but the cons outweigh the pros. You have to invest quite a bit into the Conjuration tree and also into the Illusion tree to get the Quiet Casting perk, not to mention dumping some attribute points into Magicka. Ultimately, with a heavy investment into Smithing and Enchanting, the bow you’ll have in the late game will be substantially better than any Bound Bow. It’s totally viable though and I think I’ll do some experimenting with it in the future.
LikeLike
That’s definitely true. I love how it looks though and it makes for an enjoyable change of pace when you’ve played with regular bows for some time.
LikeLike
Hi, I’m very grateful to you. Your guide is amazing. My only doubt is about the speech’s tree. It’s worthy spend some point for get better prices or not? I thought could be week my late game but I don`t know. It`s worth it?
One more time congrats for your guide, it`s amazing. Sorry for my bad english. Greeting from Brazil.
LikeLike
Thank you for your kind words. Your doubts about the Speech tree are not misplaced. You can if you just have some leftover points, but it’s not really worth it because the Speech tree is mostly used for making money and money isn’t something you need to worry about in the late game. I am still trying to find out where to put the final points after getting everything I want in the Alchemy tree. There are probably some good ways to invest them that I haven’t thought of yet.
LikeLike
Out of curiosity and because I didn’t see anyone else asked this, do you have followers you prefer with this build and if so what ones and their advantages? Btw I love all the heretofore information
LikeLike
I don’t use followers. They just get in the way of my shots and draw enemies to my position. I only use Faendal briefly for the Archery training.
LikeLike
Lots of great ideas thanks
I’ve played stealth archer many times but still found new ideas
A couple things you missed :
1) iron daggers are not the best way to level smithing at low levels. Jewelry is much much faster.
2) no reason to ever take steed stone as your main standing power. Put it on the aetherial crown and change headgear when you need the capacity. Similarly your thieves guild or black guard bodice is worth hauling around to swap in for exit strategy. Lightweight Elven feet snd hands with sneak and fortify carry are also a great idea as carry on swaps.
3) dragonbone is arguably not the best bow material. Pumped up Elven gets nearly the same damage and draws much faster. When 20 drauger are converging on your position speed matters
4). Faendal the archer is not the best hunting companion for a teething newbie archer. He’s not going to get in the way for you much. Get Cosy with one of the tanks like Lydia snd only grab the archer for 5 minutes right before every other leveling to use abuse and discard
Thanks again
LikeLike
Amazing guide that took me back to Skyrim. Quick question. At what point should we start leveling up smithing and enchanting? If done too early won’t we level up faster without any real combat upgrade?
LikeLike
I would begin leveling Smithing and Enchanting when you can go no further in the Archery and Sneak trees. As you unlock more Archery and Sneak perks, put your points into those. When you’re between new perks in Archery or Sneak, focus on Smithing and Enchanting. This will ensure you remain capable in combat situations and, in any case, the Smithing and Enchanting perks directly influence those same combat situations by granting you access to more powerful gear. Pickpocket is the skill tree you need to be careful about leveling up too quickly in the early game because it’s dangerously easy to level it by abusing quick saves.
LikeLike
Thanks, will do just that.
Used to play Skyrim on master difficulty when it got out and it was a breeze as a stealth archer. On legendary I’m finding it hard as hell. I followed your guide. Used Faendal to boost archery to 50, got the elven bow, did bleak falls and now headed to the Way of the Voice. On the road there I encounter some thugs and an old orc. Sponges, all of them. Didn’t expect that huge of a bump. Level 13. Am I doing something wrong?
LikeLike
I don’t think you’re doing anything wrong. Those packs of thugs or mercenaries can be troublesome in the early game. The build is still fragile at around level 13. You’ll just have to outmaneuver, escape, or avoid them. They’ll be a breeze later on.
LikeLike
Thanks a lot! That will be my first Skyrim playthrough after countless other TES games hours.
I have a question though – how do you avoid melee damage with this build? Is there any controlling spell/technique to avoid Mobs get close?
LikeLike
You’re welcome.
Mêlée attacks should rarely ever hit you if you keep a reasonable distance between yourself and your targets. It is, after all, a Sneak build. If you do take a hit or two, it doesn’t really matter because, assuming you’re using Smithing and Enchanting correctly, your armor should keep you alive, especially with a couple of points in the Light Armor tree.
LikeLike
This is by far the best well written Skyrim build guide I have ever seen. Clear, organized, well written and on top that the reasoning is well explained. Its practically and essay. Do you have one for the Necromancer?
LikeLiked by 1 person
Glad you liked it. I’m afraid this is the only build I feel like I know well enough to write about. I’ve always loved summoning-based builds in RPGs though.
LikeLike
Agree wholeheartedly with the general sentiment: fantastic guide! Some questions, if you have the time and inclination to answer: 1.) How do you choose to distribute the remaining 21 perk points? 2.) For your main gear, do you add a secondary enchantment to your cuirass, boots, and gauntlets? (If so, which do you find to be the most useful for this build?) 3.) Being a relative newbie, I am still getting a feel for the whole power crafting thing. While the concept makes sense, are there any other online resources that demonstrate the process in greater detail? Many thanks again for your efforts.
LikeLike
Stealth archer is just so logical….
First village… A dragon attack, need to use my bow…. Who is the first follower…a archery trainer….
Everytime i do again the game (i lost 3 times my saves) … I always return to the archer…. But in late game i eventually use one hand weapon cause my crafting gear are so powerfull and i love finishing move….
Same for heavy armor cause…. Light armor are so ugly…
So i m wondering if i should reset my character or not… And watch my times spending on the game… 75h play time…
The only things i change to the last party is i choose Wood Elf cause i wanted to do a only archery RP build… But sneak only for early game… Cause i want my ennemy see their death coming at high level (one arrow, one death)…. I finally put 2 perks to one hand skill… (The game became so easy so not afraid to more leveling ) … Level 66 and now even the ancient dragon are a joke.
Hope TES6 will improve a lot of things we are too free in this game, chest inventory sucks….pnj are too stupid… Level scaling is much better but dragon for exemple level up with the character so and don’t give more rewards. (dragon who can be OS and revered dragon give almost the same loot)
LikeLike
Great guide hypoxia29, really informative and helpful! I’m a relative newbie to Skyrim considering the hours some of you guys have put in, however I have watched/read a bit of skyrim content here and there and picked up a few things.
Questions:
1. Do you exploit Faendal by taking his gold after using his archery training?
2. Do you use trainers to gain 5 points for whichever skill you’re training every level or at least whenever you can? Or sometimes? Or not at all?
3. Can you share your go to items you carry apart from the obvious. For eg. Poison potions/Invisibility potions, Daggers for when you want to sneak attack, or maybe some mace. Looking for a general bunch of items that are useful in your quests or while roaming around skyrim that you usually carry on your character.
Thanks again!
LikeLike
Always appreciate the positive feedback. To address your first three questions:
1. Yes, I do exploit Faendal by taking the hold back after training. I’m all for any exploit that isn’t technically cheating. It has been there for a decade and it hasn’t been patched out, so use it.
2. I would say whenever I can. It’s always good when you can remember to do this, but I often find myself too absorbed in the gameplay to make a trip back to the trainer every time I gain a level. Sometimes it’s better just the actually enjoy the game.
3. I usually carry very little. Aside from my equipped gear, I carry a pickaxe, a woodcutter’s axe, the Black Star, the Skeleton Key, and, for emergencies, a few high-end health potions. The only poisons I use are the ones I pick up while exploring. I might bring an invisibility potion for a quest where I know I might need it, such as the Bound Until Death quest in the Dark Brotherhood questline. Most of what I actually carry is what I pick up along the way consisting primarily of Alchemy ingredients, ore, and various items needed for Hearthfire crafting.
LikeLike
Adding to the above:
4. Do you leave the skill books till the end since it’s harder to level up later?
5. Should I put off the main story quest for at least sometime because aren’t the random dragon attacks annoying?
LikeLike
4. I don’t have the discipline for this and I don’t find myself preoccupied with leveling as quickly as possible. I prefer to just focus on enjoying the game. The leveling will happen naturally.
5. The dragon attacks aren’t that bad for an archer build. I find gaining access to all the shouts outweighs any inconvenience caused by the dragon attacks. In any case, you need dragon souls to unlock shouts and you need dragon bone and dragon scales for crafting.
LikeLike
Great write up! My only real critique would be wasting some skill points. I’d take away Stealth 5/5 and just keep the one, literally you only need Deadly Aim. And the way critical damage is calculated in Skyrim, you don’t need the critical multiplier for archery.
Id also avoid any perks in light armor. If you focus on crafting, you will hit the armor cap no problem. I’d personally move those points into alchemy and grab green thumb. But I’m a big fan of poisons, you mentioned alchemy isnt your main jam.
Cool setup though.
LikeLike
Hey, How do you deal with the problem that arrows only fly about two feet at times? I only ask because its the main problem I run into this build. Feels like my bow has erectile dysfunction etc.
LikeLike
What are your thoughts on using Crossbow instead?
LikeLike
Hello, thank you for this guide it has been very helpful.
I have misplaced/lost my elven bow and can’t seem to find it. What should I do? Does the bow respawn in the case I stole it from or should I look for better bows? I am around level 10. Thanks for the help.
LikeLiked by 1 person
Did the guards catch you for a bounty? If you paid it off they would have taken all stolen items from you. The bow is marked as “stolen”
LikeLike
Hey… First of all: I am from Germany, so excuse my english.
I read your guide because I heard that an Archer is the most-played Char in the game. At least I got some experience with the game like 7 years ago… But played “freestyle”. Now I bought the game for my Nintendo Switch and I will start like a newbie.
Is your build a good way to play with no experience? It is the first detailed guide for a build I’d found in the internet…. And I am not sure if this build is really a good way to go for person like me.
Maybe… If it’s not… Do you have any reference to a “newbie-friendly” guide?
Thank you so much for your work :).
LikeLike
Hello. I think it’s perfect for a newbie because the sneak archer was my first build.
LikeLike
Hi & thanks very much for the guide, I picked up Skyrim again after 8 years break and totally enjoying this new build (used to play a spellsword before), plays almost like my favorite Sniper builds in Fallout games. Would love to donate a bit of cash for you putting this together for all of us, let me know if there’s a way to do this
LikeLiked by 1 person
After getting the Anniversary edition, I’m running a sneak archer in Survival Mode (only on adept, as I don’t dare try legendary yet). Would you change anything in the build to cope with the cold/hunger/tiredness maluses? With no fast travel, a horse becomes essential, obviously. Any other ideas?
LikeLike